You must
agree in order to register with the ACME server. Do you agree?
- - - - - - - - - - - - - - - - - - - - - - - - - - - - - - - - - - - - - - - -
(Y)es/(N)o: y
- - - - - - - - - - - - - - - - - - - - - - - - - - - - - - - - - - - - - - - -
Would you be willing, once your first certificate is successfully issued, to
share your email address with the Electronic Frontier Foundation, a founding
partner of the Let's Encrypt project and the non-profit organization that
develops Certbot? We'd like to send you email about our work encrypting the web,
EFF news, campaigns, and ways to support digital freedom.
- - - - - - - - - - - - - - - - - - - - - - - - - - - - - - - - - - - - - - - -
(Y)es/(N)o: n
Account registered.
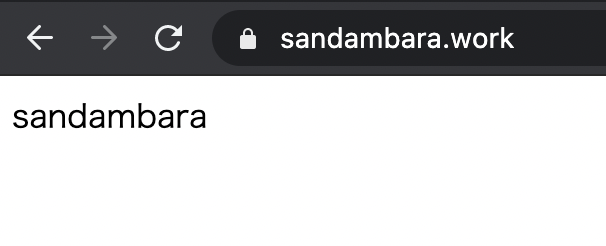
Requesting a certificate for sandambara.work
Performing the following challenges:
http-01 challenge for sandambara.work
Using the webroot path /var/www/html/sandambara for all unmatched domains.
Waiting for verification...
Cleaning up challenges
IMPORTANT NOTES:
- Congratulations! Your certificate and chain have been saved at:
/etc/letsencrypt/live/sandambara.work/fullchain.pem
Your key file has been saved at:
/etc/letsencrypt/live/sandambara.work/privkey.pem
Your certificate will expire on 2021-08-20. To obtain a new or
tweaked version of this certificate in the future, simply run
certbot again. To non-interactively renew *all* of your
certificates, run "certbot renew"
- If you like Certbot, please consider supporting our work by:
Donating to ISRG / Let's Encrypt: https://letsencrypt.org/donate
Donating to EFF: https://eff.org/donate-le
[ec2-user@ip-172-31-11-12 ~]$
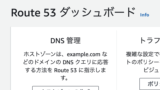
IMPORTANT NOTES:に続いて「Congratulations!」とあれば成功です。証明書が保存されているディレクトリは「/etc/letsencrypt/live/SSLにしたドメイン/」です。
[ec2-user@ip-172-31-11-12 ~]$ sudo ls -l /etc/letsencrypt/live/sandambara.work/
total 4
lrwxrwxrwx 1 root root  39 May 22 12:40 cert.pem -> ../../archive/sandambara.work/cert1.pem
lrwxrwxrwx 1 root root  40 May 22 12:40 chain.pem -> ../../archive/sandambara.work/chain1.pem
lrwxrwxrwx 1 root root  44 May 22 12:40 fullchain.pem -> ../../archive/sandambara.work/fullchain1.pem
lrwxrwxrwx 1 root root  42 May 22 12:40 privkey.pem -> ../../archive/sandambara.work/privkey1.pem
-rw-r--r-- 1 root root 692 May 22 12:40 README

 letsencrypt.org You must
agree in order to register with the ACME server. Do you agree?
- - - - - - - - - - - - - - - - - - - - - - - - - - - - - - - - - - - - - - - -
(Y)es/(N)o: y
- - - - - - - - - - - - - - - - - - - - - - - - - - - - - - - - - - - - - - - -
Would you be willing, once your first certificate is successfully issued, to
share your email address with the Electronic Frontier Foundation, a founding
partner of the Let's Encrypt project and the non-profit organization that
develops Certbot? We'd like to send you email about our work encrypting the web,
EFF news, campaigns, and ways to support digital freedom.
- - - - - - - - - - - - - - - - - - - - - - - - - - - - - - - - - - - - - - - -
(Y)es/(N)o: n
Account registered.
Requesting a certificate for sandambara.work
Performing the following challenges:
http-01 challenge for sandambara.work
Using the webroot path /var/www/html/sandambara for all unmatched domains.
Waiting for verification...
Cleaning up challenges
IMPORTANT NOTES:
- Congratulations! Your certificate and chain have been saved at:
/etc/letsencrypt/live/sandambara.work/fullchain.pem
Your key file has been saved at:
/etc/letsencrypt/live/sandambara.work/privkey.pem
Your certificate will expire on 2021-08-20. To obtain a new or
tweaked version of this certificate in the future, simply run
certbot again. To non-interactively renew *all* of your
certificates, run "certbot renew"
- If you like Certbot, please consider supporting our work by:
Donating to ISRG / Let's Encrypt: https://letsencrypt.org/donate
Donating to EFF: https://eff.org/donate-le
[ec2-user@ip-172-31-11-12 ~]$
letsencrypt.org You must
agree in order to register with the ACME server. Do you agree?
- - - - - - - - - - - - - - - - - - - - - - - - - - - - - - - - - - - - - - - -
(Y)es/(N)o: y
- - - - - - - - - - - - - - - - - - - - - - - - - - - - - - - - - - - - - - - -
Would you be willing, once your first certificate is successfully issued, to
share your email address with the Electronic Frontier Foundation, a founding
partner of the Let's Encrypt project and the non-profit organization that
develops Certbot? We'd like to send you email about our work encrypting the web,
EFF news, campaigns, and ways to support digital freedom.
- - - - - - - - - - - - - - - - - - - - - - - - - - - - - - - - - - - - - - - -
(Y)es/(N)o: n
Account registered.
Requesting a certificate for sandambara.work
Performing the following challenges:
http-01 challenge for sandambara.work
Using the webroot path /var/www/html/sandambara for all unmatched domains.
Waiting for verification...
Cleaning up challenges
IMPORTANT NOTES:
- Congratulations! Your certificate and chain have been saved at:
/etc/letsencrypt/live/sandambara.work/fullchain.pem
Your key file has been saved at:
/etc/letsencrypt/live/sandambara.work/privkey.pem
Your certificate will expire on 2021-08-20. To obtain a new or
tweaked version of this certificate in the future, simply run
certbot again. To non-interactively renew *all* of your
certificates, run "certbot renew"
- If you like Certbot, please consider supporting our work by:
Donating to ISRG / Let's Encrypt: https://letsencrypt.org/donate
Donating to EFF: https://eff.org/donate-le
[ec2-user@ip-172-31-11-12 ~]$ 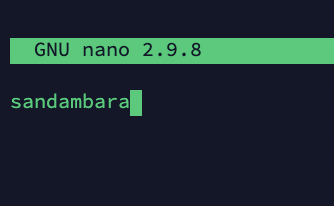
コメント