AWS上のEC2をSSL化しWordPress構築をゴールとする記事。前回までで下準備が終わり、いよいよWordPress構築に取りかかります。
この記事の趣旨
自分が分からなかったこと・知らなかったことをググり倒した結果を備忘録として残すことが目的で、初学者の方に教え伝えるものではありません(きっぱり)。
誤認と思われる箇所は教えて頂ければうれしいです。
ここまでの流れ
EC2構築〜Route53の設定あたりまではこちらをご覧ください。
Let’s EncryptでSSL化する手順はこちらをご覧ください。

今回やること
- httpd(Apache)に関する設定変更
- PHPのインストール
- MariaDBのインストール
- WordPressのインストール
このあたりかと思います。phpMyAdminが必要な方はそれも加えておきましょう(この記事ではスキップします)。
httpd(Apache)に関する設定変更
コンテンツが保存される/var/www配下にec2-userが書き込みできるようにするため、apacheグループに追加しディレクトリの所有権を変更します。
sudo usermod -a -G apache ec2-user
sudo chown -R ec2-user:apache /var/www
PHPインストール
今回は7.4を利用します。
sudo amazon-linux-extras enable php7.4続いてインストールです。
[ec2-user@ip-172-31-11-12 html]$ sudo yum install php php-gd php-mysqlnd php-xmlrpc
Loaded plugins: extras_suggestions, langpacks, priorities, update-motd
amzn2-core

# 中略

Dependencies Resolved

================================================================================================================================================================================================
 Package                                     Arch                                   Version                                             Repository                                         Size
================================================================================================================================================================================================
Installing:
 php                                         x86_64                                 7.4.15-1.amzn2                                      amzn2extra-php7.4                                 3.2 M
 php-gd                                      x86_64                                 7.4.15-1.amzn2                                      amzn2extra-php7.4                                 182 k
 php-mysqlnd                                 x86_64                                 7.4.15-1.amzn2                                      amzn2extra-php7.4                                 241 k
 php-xmlrpc                                  x86_64                                 7.4.15-1.amzn2                                      amzn2extra-php7.4                                  88 k
Installing for dependencies:
 libxslt                                     x86_64                                 1.1.28-6.amzn2                                      amzn2-core                                        240 k
 libzip                                      x86_64                                 1.3.2-1.amzn2.0.1                                   amzn2-core                                         62 k
 php-cli                                     x86_64                                 7.4.15-1.amzn2                                      amzn2extra-php7.4                                 4.9 M
 php-common                                  x86_64                                 7.4.15-1.amzn2                                      amzn2extra-php7.4                                 1.1 M
 php-json                                    x86_64                                 7.4.15-1.amzn2                                      amzn2extra-php7.4                                  71 k
 php-pdo                                     x86_64                                 7.4.15-1.amzn2                                      amzn2extra-php7.4                                 134 k
 php-xml                                     x86_64                                 7.4.15-1.amzn2                                      amzn2extra-php7.4                                 199 k

Transaction Summary
================================================================================================================================================================================================
Install  4 Packages (+7 Dependent packages)

# 以下省略
MariaDBインストール
次にMariaDBをインストールしましょう。
[ec2-user@ip-172-31-11-12 html]$ sudo yum install mariadb mariadb-server
Loaded plugins: extras_suggestions, langpacks, priorities, update-motd
237 packages excluded due to repository priority protections
Resolving Dependencies

# 中略

Dependencies Resolved

================================================================================================================================================================================================
 Package                                               Arch                                 Version                                              Repository                                Size
================================================================================================================================================================================================
Installing:
 mariadb                                               x86_64                               1:5.5.68-1.amzn2                                     amzn2-core                               8.8 M
 mariadb-server                                        x86_64                               1:5.5.68-1.amzn2                                     amzn2-core                                11 M
Installing for dependencies:
 perl-Compress-Raw-Bzip2                               x86_64                               2.061-3.amzn2.0.2                                    amzn2-core                                32 k
 perl-Compress-Raw-Zlib                                x86_64                               1:2.061-4.amzn2.0.2                                  amzn2-core                                58 k
 perl-DBD-MySQL                                        x86_64                               4.023-6.amzn2                                        amzn2-core                               141 k
 perl-DBI                                              x86_64                               1.627-4.amzn2.0.2                                    amzn2-core                               804 k
 perl-Data-Dumper                                      x86_64                               2.145-3.amzn2.0.2                                    amzn2-core                                48 k
 perl-IO-Compress                                      noarch                               2.061-2.amzn2                                        amzn2-core                               260 k
 perl-Net-Daemon                                       noarch                               0.48-5.amzn2                                         amzn2-core                                51 k
 perl-PlRPC                                            noarch                               0.2020-14.amzn2                                      amzn2-core                                36 k

Transaction Summary
================================================================================================================================================================================================
Install  2 Packages (+8 Dependent packages)

Total download size: 22 M
Installed size: 110 M
Is this ok [y/d/N]: y
Downloading packages:

# 以下省略
MariaDB起動
DBを起動→仮想マシン起動時に自動起動するようにします。
sudo systemctl start mariadb
sudo systemctl enable mariadb
DBのセットアップ
mysql_secure_installationを実行します。
sudo mysql_secure_installation「Enter current password for root (enter for none);」と表示されます。現在rootパスワードはありませんのでそのままEnterキーを押下します。
「Set root password?」はyで進みます。確認用も含め2回パスワードを入力しましょう。忘れないようご注意を!
匿名ユーザーは利用しませんので「Remove anonymous users?」はyで進みます。
rootのリモートログインを無効にするため「Disallow root login remotely? [Y/n]」はyで進みます。
「Remove test database and access to it? [Y/n]」はyで進みテストDBを削除します。
あとは「Reload privilege tables now? [Y/n]」をyで進み、権限情報を読み直して終了です。
[ec2-user@ip-172-31-11-12 html]$ sudo mysql_secure_installation

NOTE: RUNNING ALL PARTS OF THIS SCRIPT IS RECOMMENDED FOR ALL MariaDB
      SERVERS IN PRODUCTION USE!  PLEASE READ EACH STEP CAREFULLY!

In order to log into MariaDB to secure it, we'll need the current
password for the root user.  If you've just installed MariaDB, and
you haven't set the root password yet, the password will be blank,
so you should just press enter here.

Enter current password for root (enter for none):
OK, successfully used password, moving on...

Setting the root password ensures that nobody can log into the MariaDB
root user without the proper authorisation.

Set root password? [Y/n] y
New password:
Re-enter new password:
Password updated successfully!
Reloading privilege tables..
 ... Success!


By default, a MariaDB installation has an anonymous user, allowing anyone
to log into MariaDB without having to have a user account created for
them.  This is intended only for testing, and to make the installation
go a bit smoother.  You should remove them before moving into a
production environment.

Remove anonymous users? [Y/n] y
 ... Success!

Normally, root should only be allowed to connect from 'localhost'.  This
ensures that someone cannot guess at the root password from the network.

Disallow root login remotely? [Y/n] y
 ... Success!

By default, MariaDB comes with a database named 'test' that anyone can
access.  This is also intended only for testing, and should be removed
before moving into a production environment.

Remove test database and access to it? [Y/n] y
 - Dropping test database...
 ... Success!
 - Removing privileges on test database...
 ... Success!

Reloading the privilege tables will ensure that all changes made so far
will take effect immediately.

Reload privilege tables now? [Y/n] y
 ... Success!

Cleaning up...

All done!  If you've completed all of the above steps, your MariaDB
installation should now be secure.

Thanks for using MariaDB!
WordPress用DB設定
WordPressが利用するDBの設定を行います。mysql -u root -pでDBに接続します。パスワードは先ほど決めたパスワードを入力します。
[ec2-user@ip-172-31-11-12 ~]$ mysql -u root -p
Enter password:
Welcome to the MariaDB monitor.  Commands end with ; or \g.
Your MariaDB connection id is 10
Server version: 5.5.68-MariaDB MariaDB Server

Copyright (c) 2000, 2018, Oracle, MariaDB Corporation Ab and others.

Type 'help;' or '\h' for help. Type '\c' to clear the current input statement.

MariaDB [(none)]>
DB接続用ユーザー作成とそのパスワード設定を行います。
create user 'wordpress-user'@'localhost' identified by 'お好きなパスワード';「お好きなパスワード」は先ほどログインで利用したものとは別のものを設定します(同じでも良いのですがrootと一般ユーザーが同じパスワードというのはセキュリティ的に問題ありですね)。
MariaDB [(none)]> create user 'wordpress-user'@'localhost' identified by 'お好きなパスワード';
Query OK, 0 rows affected (0.00 sec)
続いてWordPress用のDBを作成します。wordpress-dbの前後にあるのはシングルコーテーションではなくバッククオートですのでご注意ください。日本語配列のキーボードであればSHIFT+@で入力できます。
create database `wordpress-db`;間違ってシングルコーテーションを入力すると怒られます。
MariaDB [(none)]> create database 'wordpress-db';
ERROR 1064 (42000): You have an error in your SQL syntax; check the manual that corresponds to your MariaDB server version for the right syntax to use near ''wordpress-db'' at line 1
このようになればOKです。
MariaDB [(none)]> create database `wordpress-db`;
Query OK, 1 row affected (0.00 sec)
続いてwordpress-userにDBへのアクセス権限を付与します。気前よくALLを付与します。ここもwordpress-db前後はバッククオートです。
grant all privileges on `wordpress-db`.* to "wordpress-user"@"localhost";ちなみにwordpress-user@localhostの箇所のダブルコーテーションはシングルコーテーションでもエラーになりません。ややこしいですね。
MariaDB [(none)]> grant all privileges on `wordpress-db`.* to 'wordpress-user'@'localhost';
Query OK, 0 rows affected (0.00 sec)

MariaDB [(none)]> grant all privileges on `wordpress-db`.* to "wordpress-user"@"localhost";
Query OK, 0 rows affected (0.00 sec)
最後に変更を有効にするためデータベース権限をフラッシュしましょう。リロードではなくフラッシュなのが面白いなと思いました。
flush privileges;あとはDBを抜けて終了します。
exitWordPressダウンロード
ホームディレクトリにいることを確認して作業を進めます。
[ec2-user@ip-172-31-11-12 html]$ cd ~
[ec2-user@ip-172-31-11-12 ~]$ pwd
/home/ec2-user
WordPressをダウンロードし解凍しましょう。
wget https://wordpress.org/latest.tar.gz
tar -xzvf latest.tar.gz
wp-config.phpの準備
初期設定情報を書き込むwp-config.phpを作成します。wp-config-sample.phpという名前のサンプルファイルがあるのでそれをコピーして使います。
cp wordpress/wp-config-sample.php wordpress/wp-config.phpファイルを編集しましょう。
nano wordpress/wp-config.php編集が必要なのは下記の「define」から始まる部分のうち3カ所です。
// ** MySQL settings - You can get this info from your web host ** //
/** The name of the database for WordPress */
define( 'DB_NAME', 'database_name_here' );     ← ココ(1)

/** MySQL database username */
define( 'DB_USER', 'username_here' );        ← ココ(2)

/** MySQL database password */
define( 'DB_PASSWORD', 'password_here' );      ← ココ(3)

/** MySQL hostname */
define( 'DB_HOST', 'localhost' );

/** Database Charset to use in creating database tables. */
define( 'DB_CHARSET', 'utf8' );

/** The Database Collate type. Don't change this if in doubt. */
define( 'DB_COLLATE', '' );
下記のように編集します。
- database_name_here → wordpress-db
- username_here → wordpress-user
- password_here → 「WordPress用DB設定」で設定したパスワード
編集が終わったらCtrl + x → y → Enterキーで保存して終了します。
前回の記事でやったことの後処理
前回の記事の最後でテストを行うためにDocumentRootにindex.htmlを作りました。これが残っているとWordPressが正しく動きませんのでファイルをリネームしておきます。
sudo mv /var/www/html/sandambara/index.html /var/www/html/sandambara/index.html.orgWordPressファイル群をコピー
ホームディレクトリにあるWordPress配下のフォルダ・ファイルをSSL設定で作成したディレクトリsandambaraの直下にコピーします。
[ec2-user@ip-172-31-11-12 ~]$ cp -r wordpress/* /var/www/html/sandambara/
[ec2-user@ip-172-31-11-12 ~]$ ls -l /var/www/html/sandambara
total 212
-rw-r--r--  1 ec2-user apache      11 May 22 13:20 index.html.org
-rw-r--r--  1 ec2-user ec2-user   405 May 23 02:24 index.php
-rw-r--r--  1 ec2-user ec2-user 19915 May 23 02:24 license.txt
-rw-r--r--  1 ec2-user ec2-user  7345 May 23 02:24 readme.html
-rw-r--r--  1 ec2-user ec2-user  7165 May 23 02:24 wp-activate.php
drwxr-xr-x  9 ec2-user ec2-user  4096 May 23 02:24 wp-admin
-rw-r--r--  1 ec2-user ec2-user   351 May 23 02:24 wp-blog-header.php
-rw-r--r--  1 ec2-user ec2-user  2328 May 23 02:24 wp-comments-post.php
-rw-r--r--  1 ec2-user ec2-user  2911 May 23 02:24 wp-config.php
-rw-r--r--  1 ec2-user ec2-user  2913 May 23 02:24 wp-config-sample.php
drwxr-xr-x  4 ec2-user ec2-user    52 May 23 02:24 wp-content
-rw-r--r--  1 ec2-user ec2-user  3939 May 23 02:24 wp-cron.php
drwxr-xr-x 25 ec2-user ec2-user  8192 May 23 02:24 wp-includes
-rw-r--r--  1 ec2-user ec2-user  2496 May 23 02:24 wp-links-opml.php
-rw-r--r--  1 ec2-user ec2-user  3313 May 23 02:24 wp-load.php
-rw-r--r--  1 ec2-user ec2-user 44994 May 23 02:24 wp-login.php
-rw-r--r--  1 ec2-user ec2-user  8509 May 23 02:24 wp-mail.php
-rw-r--r--  1 ec2-user ec2-user 21125 May 23 02:24 wp-settings.php
-rw-r--r--  1 ec2-user ec2-user 31328 May 23 02:24 wp-signup.php
-rw-r--r--  1 ec2-user ec2-user  4747 May 23 02:24 wp-trackback.php
-rw-r--r--  1 ec2-user ec2-user  3236 May 23 02:24 xmlrpc.php
httpd(Apache)の設定変更
/etc/httpd/conf/httpd.confを修正します。<Directory “/var/www/html”>のセクションにある「AllowOverride None」を「AllowOverride All」に書き換えます。
sudo nano /etc/httpd/conf/httpd.confCtrl + w で検索文字列を入力できるようになりますので<Directory “/var/www/html”>を探しましょう。AllowOverrideはあちこちにあるので<Directory “/var/www/html”>で探しましょう。
書き換えたらCtrl + x → y → Enterキーで保存して終了します。
DocumentRootの書き込み許可設定
次のコマンドで/var/wwwへApacheが書き込みできるようにします。2775って指定の仕方、初めてしりました(モグリ)。
sudo chown -R apache /var/www
sudo chgrp -R apache /var/www
sudo chmod 2775 /var/www
find /var/www -type d -exec sudo chmod 2775 {} \;
終わったらhttpdを再起動します。
sudo systemctl restart httpdWordPressインストール
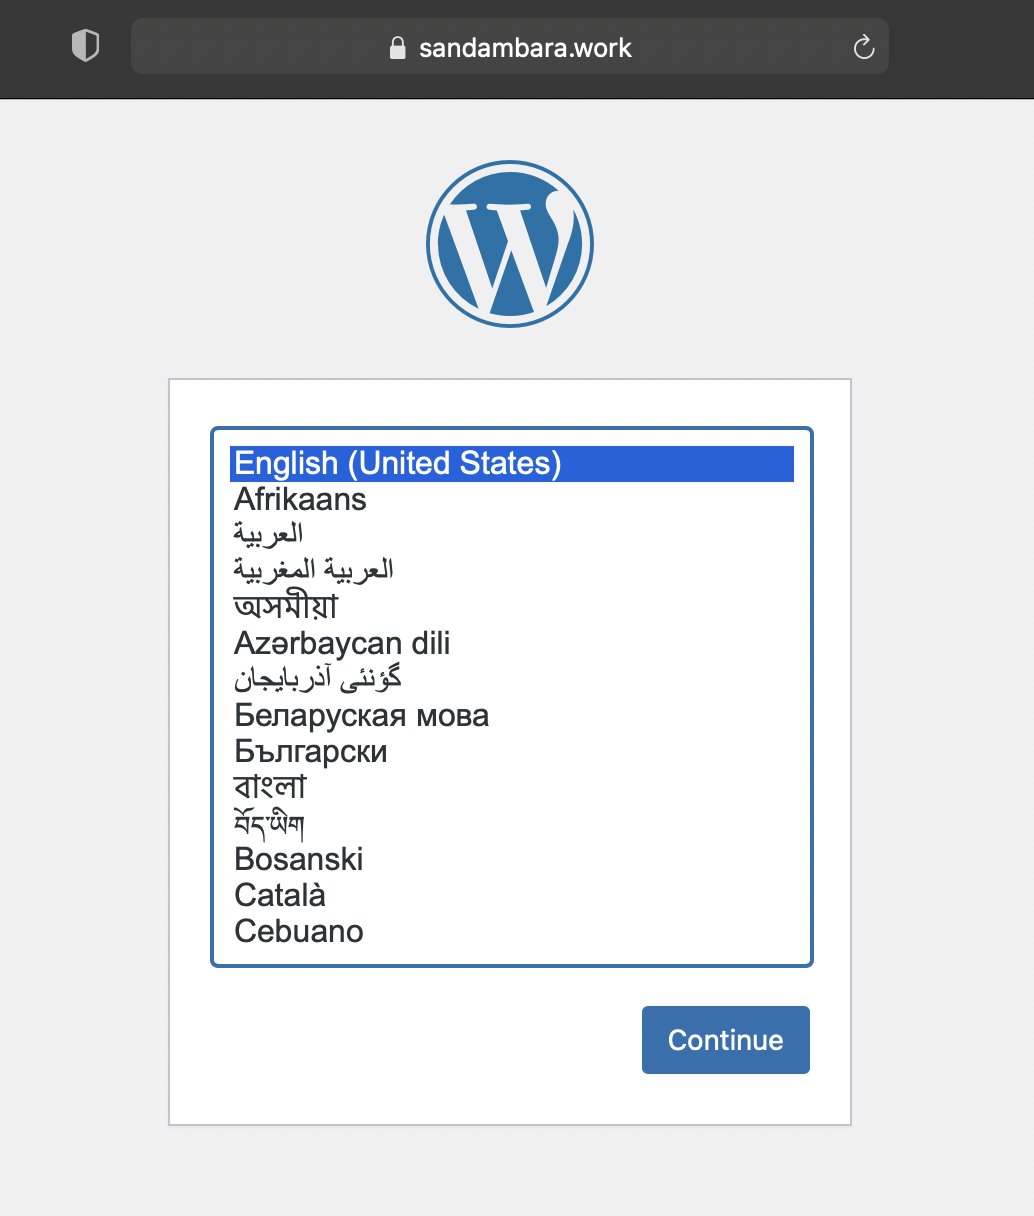
いよいよWordPressのインストールです。1回目で設定した独自ドメインと2回目で設定したSSLがキク瞬間です。ブラウザで早速アクセスしてみましょう!
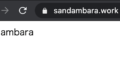
https://sandambara.work/wp-admin/install.phpうまくアクセスできない場合は/etc/httpd/conf/httpd.confでDocumentRootを確認しましょう。
DocumentRoot "/var/www/html/sandambara"初期設定を行います。サイトのタイトルはお好みで。ユーザー名はWordPressにログインするためのユーザーです。パスワードはお好みでどうぞ。
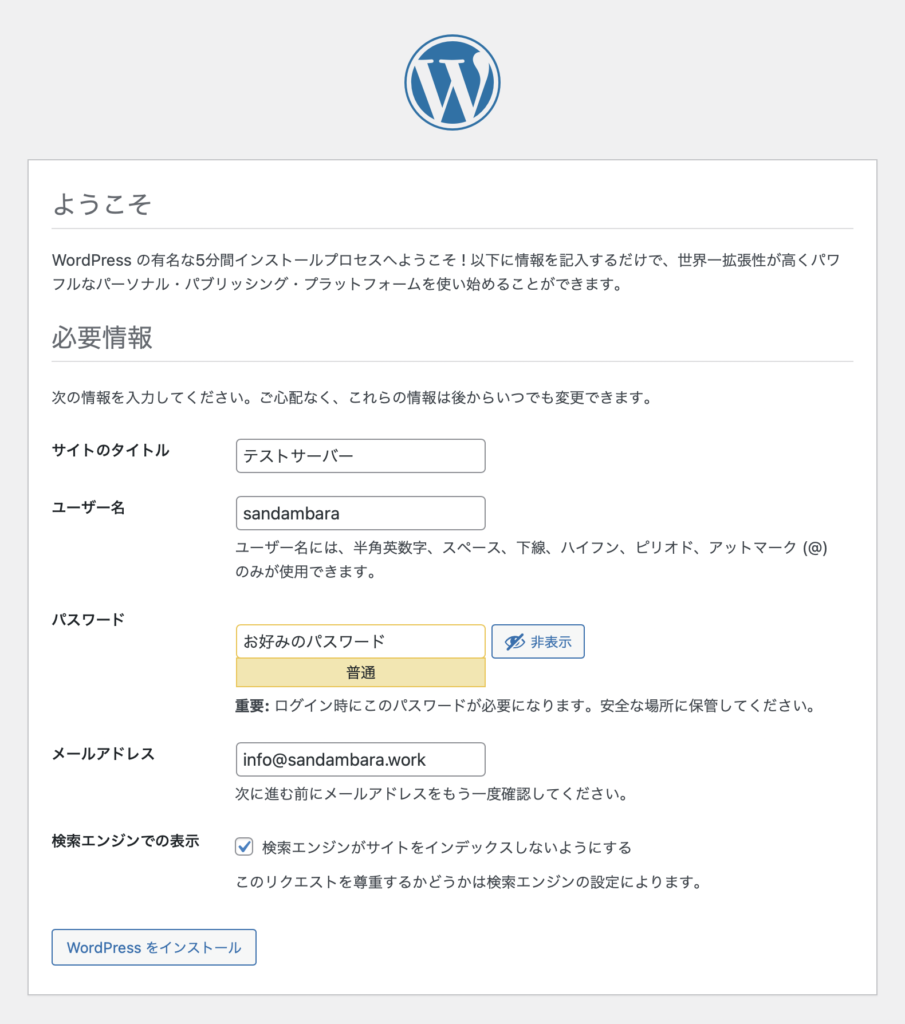
テストサーバーの場合は「検索エンジンがサイトをインデックスしないようにする」へチェックを付けておきましょう。
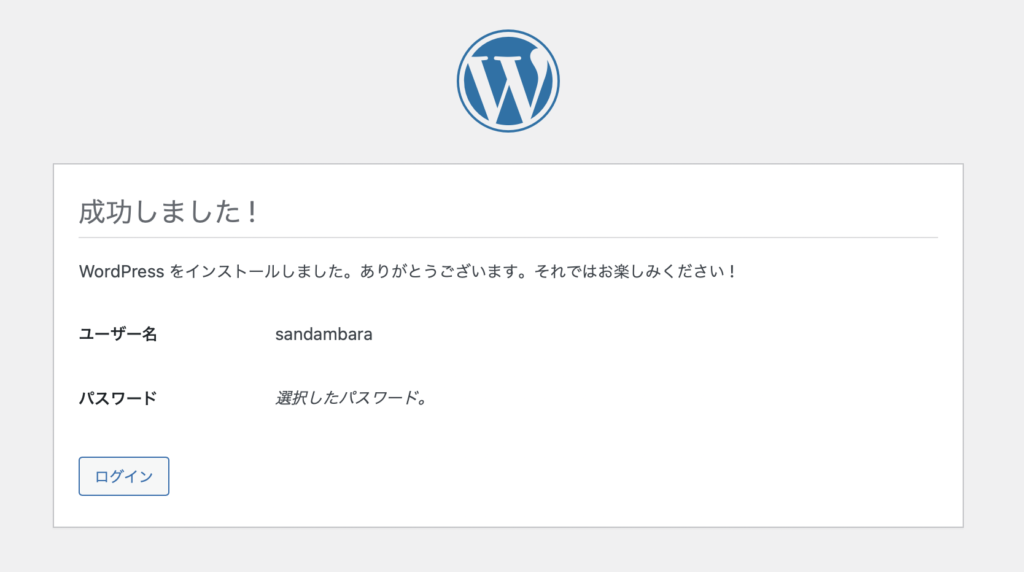
では、ログインをクリックして今設定した認証情報でログインしてみましょう。うまくいったら初投稿でもどうぞ!
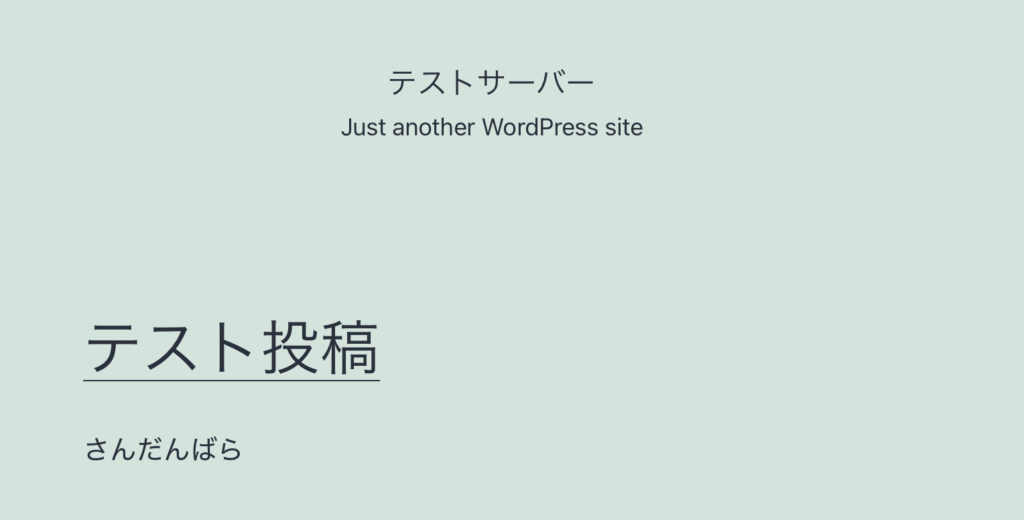
随分長くなりましたが、無事目的達成です!!!
まとめ
クイックインストール最高。

コメント